

Plunge into DIY: Simple Solutions for Toilet Repairs
Dear Homeowner,
Imagine this: It’s a quiet Sunday evening, and you’re cozily curled up with your favorite book. Suddenly, a foreboding gurgle interrupts your tranquility, followed by the unmistakable sound of water spilling onto the floor. Panic sets in as you dash to the bathroom, only to find your trusty toilet has transformed into a rebellious fountain. 😱💦
Meet Emma, a graphic designer and self-proclaimed “DIY disaster.” She’s all too familiar with these unexpected toilet tantrums. Like many of us, Emma used to dread the thought of toilet repairs, envisioning a complex labyrinth of pipes and gizmos. But, as she soon discovered, fixing a toilet is less like defusing a bomb and more like solving a straightforward puzzle. 🧩
The Simplified World of Toilet Repairs
Emma learned that the average toilet, despite its essential role in our homes, is surprisingly simple. It’s all about gravity and a bit of clever engineering. When you flush, water stored in the tank rushes into the bowl, whisking away its contents. It’s like a mini waterpark ride for… well, you know. 🌊🚽
But when things go awry, as they did for Emma that Sunday evening, the solutions are often simpler than you’d think. Let’s walk through some common issues and their DIY fixes – no plumbing degree required!


Overflowing Bowl
Emma first tackled the dreaded overflowing toilet. Armed with nothing but a plunger and newfound confidence, she vanquished the clog that had caused the chaos. The trick? A firm seal with the plunger and a vigorous, rhythmic push-and-pull.
- Stay Calm and Turn Off the Water:
- Step 1: Locate the water valve behind the toilet, close to the floor.
- Step 2: Turn the valve clockwise until it stops to shut off the water supply. This prevents more water from entering the tank and bowl.
- Prepare the Area:
- Step 1: Lay towels or newspapers around the base of the toilet. This helps manage any spills or splashes.
- Step 2: Put on rubber gloves for hygiene.
- Create a Good Seal:
- Step 1: Insert the plunger into the toilet bowl, covering the hole completely.
- Step 2: Make sure the flange is inside the hole and the cup seals around the outside.
- Use Proper Plunging Technique:
- Step 1: Start with a gentle plunge to remove the air and get a good seal. Pushing too hard initially can cause splashing.
- Step 2: Once the seal is secure, use a firm push-and-pull motion. The goal is to create enough pressure to dislodge the clog.
- Check and Repeat if Necessary:
- Step 1: After several pushes and pulls, lift the plunger slightly to break the seal.
- Step 2: Check if water drains normally. If not, repeat the plunging process.
The Wiggly Handle
Next up, the floppy handle that refused to flush. Emma peeked inside the tank and found a loose chain – a quick reattachment, and she was back in business!
- Diagnose the Problem:
- Step 1: Remove the lid from the toilet tank carefully and set it aside in a safe place.
- Step 2: Inspect the handle and notice if it feels loose or disconnected.
- Identify the Loose Chain:
- Step 1: Locate the chain inside the tank. This chain connects the handle lever to the flapper valve.
- Step 2: Check if the chain is disconnected or has excess slack.
- Adjust the Chain Length:
- Step 1: If the chain is too loose, shorten it by hooking it to a different hole on the lever arm, creating less slack.
- Step 2: Ensure the chain has only about 1/2 inch of slack for optimal performance.
- Reattach or Replace the Chain:
- Step 1: If the chain has come off the lever arm, reattach it to the hole at the end of the arm.
- Step 2: If the chain is damaged or broken, you may need to replace it with a new one available at hardware stores.
- Test the Handle:
- Step 1: Gently test the toilet handle to ensure it now has resistance and feels more secure.
- Step 2: Observe the lifting mechanism to ensure the flapper valve opens and closes properly when the handle is used.
- Adjust as Needed:
- Step 1: If the handle still feels loose or the toilet doesn’t flush properly, readjust the chain length or position.
- Step 2: Check the handle screw inside the tank; if it’s loose, tighten it with a screwdriver.


The Running Water Symphony
The constant trickle of water not only haunted Emma’s ears, but was costing her as much as $50 a month! Emma learned that there are three main causes for her running toilet
- The flapper chain may be too short or tangled which is causing water to leak! Emma learned to leave only a small amount of slack in the chain to ensure a quality flush
- Emma then checked the flapper, a red rubber piece at the bottom of the toilet. She replaced the flapper in no time with the Flapper Repair Kit
Mysterious Puddles
The most daunting challenge was the mysterious puddle around the toilet base. A bit of detective work (and some colorful food dye) revealed a faulty wax ring. Though it was a two-person job, Emma and her trusty friend managed to replace it using the all-in-one Flange Repair Kit, saying goodbye to bathroom floods.

Through these adventures, Emma transformed from a plumbing novice to a DIY enthusiast. And guess what? You can too!
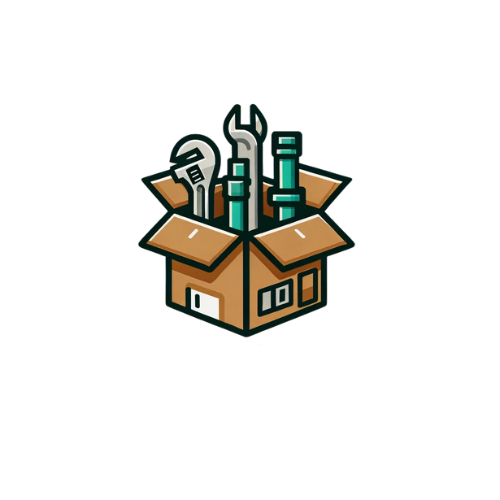
But wait, there’s more to Emma’s secret than just bravery and a can-do attitude. She had a trusty ally: the All-in-One Toilet-Tune Up DIY Kit. This kit turned her bathroom blunders into triumphs, and it can do the same for you!
Why Choose the All-in-One Toilet-Tune Up DIY Kit?
- Everything You Need in One Box: From trusty tools to easy-to-follow instructions, this kit is your one-stop solution for all common toilet troubles.
- Save Time and Money: No more frantic hardware store runs or expensive plumber calls. With this kit, you become your own plumbing hero.
- User-Friendly for Beginners: Whether you’re a complete novice like Emma or a seasoned DIYer, this kit is designed for all skill levels.
- Ready to take the plunge into hassle-free toilet repairs? Grab your All-in-One Toilet-Tune Up DIY Kit today and turn your bathroom woes into wins!
[🛒 Click Here to Order Your DIY Kit Now! 🛒]
To your DIY success,
Emma
P.S. Remember, every great DIYer started with a single step (and maybe a rogue toilet). With the All-in-One Toilet-Tune Up DIY Kit, you’re not just buying tools; you’re unlocking a whole new level of home independence. You’ve got this! 👍🛠️


